Vein anatomy for IV cannulation is the set of structural facts about superficial veins, valves, and surrounding tissue that lets you predict how a vein will behave before you break the skin. When you know what you are feeling for, site selection stops being a guess and becomes a decision. That shift is what separates providers who hesitate from providers who become the go-to person for vascular access on their unit.
Most failed peripheral IV attempts are not random bad luck. They come from choosing a vein that looked fine on the surface but was about to branch, sit on top of a valve, or roll the moment it met a catheter. Anatomy is the quiet input behind every clean stick.
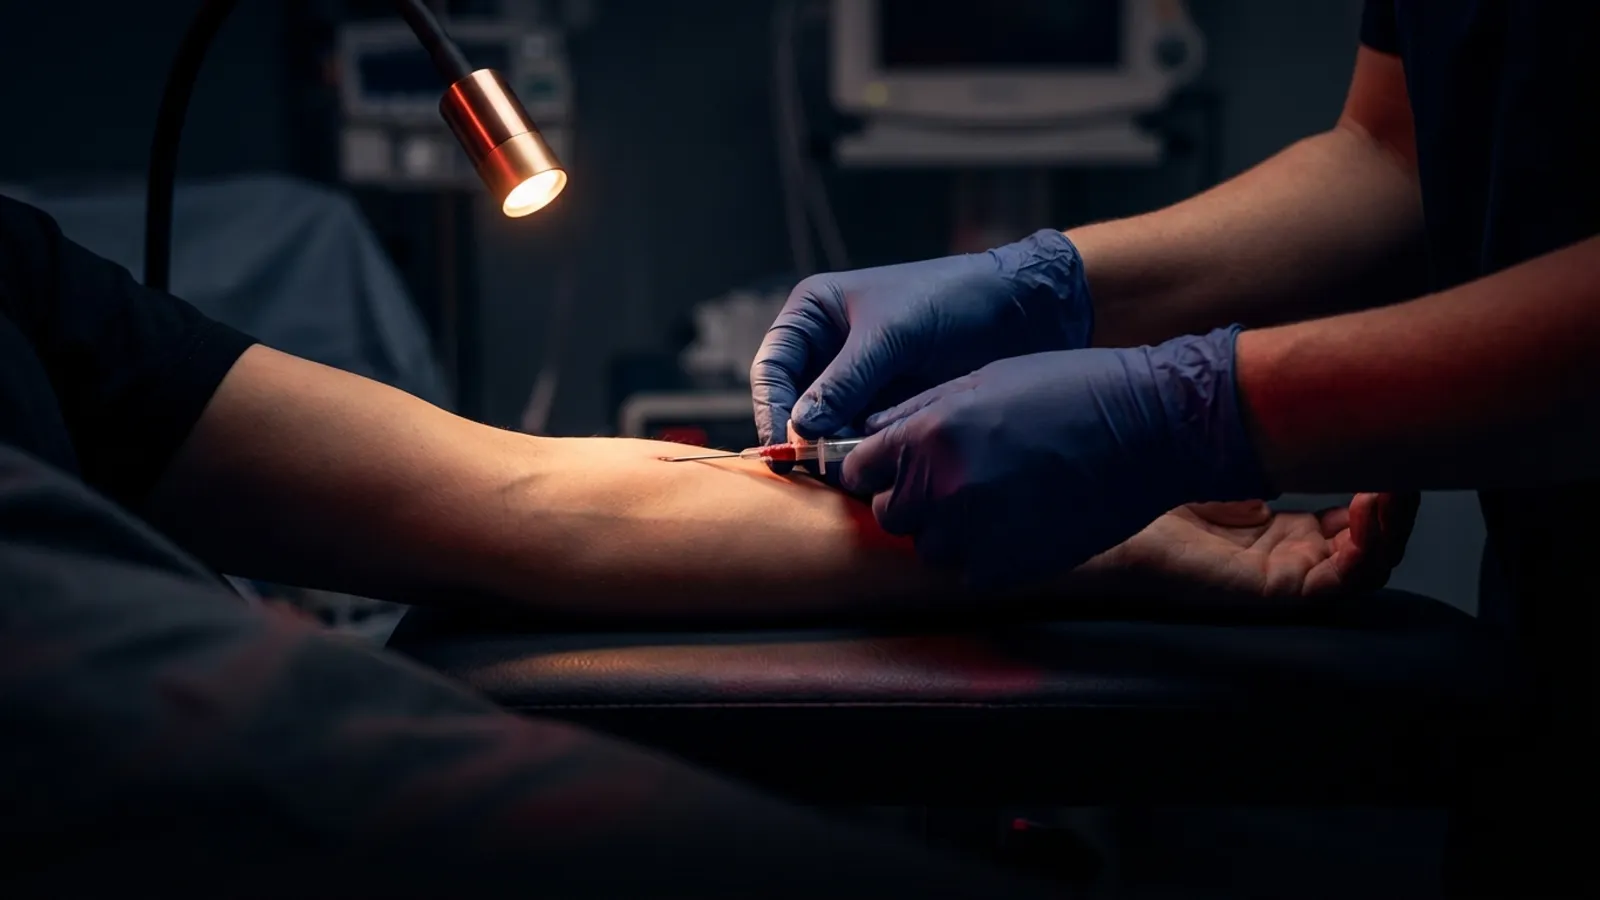
What vein anatomy for IV cannulation changes at the bedside
Definition. Vein anatomy for IV cannulation means knowing where superficial veins run, how valves interrupt flow, how the cephalic and basilic systems connect near the elbow, and how nerves and arteries relate to common puncture sites. You use that map to pick a straight segment with adequate diameter and to avoid high-risk zones like the volar wrist.
Why it matters. Palpation is not magic. It is pattern recognition trained on real structures. When you can name what you are touching, you can explain why a site is better than another option on the same arm. That clarity lowers the mental noise that spikes your stress response right before the stick.
According to the Merck Manual Professional Edition's overview of peripheral vein cannulation, peripheral IVs are typically placed in upper-extremity superficial veins using a catheter-over-needle device, and successful placement depends on matching catheter size and insertion technique to the vessel you actually entered. In plain terms, anatomy is what lets you match tool to vessel instead of hoping they line up.
Superficial veins you will use most often
In the hand and forearm, you will work most often with the dorsal venous network, the cephalic vein along the radial side, and the basilic vein along the ulnar side. Near the antecubital fossa, the median cubital vein (or nearby variants) often forms a useful bridge between systems. These names are not trivia. They tell you which direction a vein is likely to travel when you anchor it, and which tributaries might pull the vessel sideways when you enter it.
The median cubital region can offer a large target, but it is not always the best default for every infusion. Veins that cross a joint crease may kink with flexion, and some patients need a lower profile site for comfort. Your goal is not the biggest vein on the arm. It is the straightest, most stable segment that fits the therapy and the catheter gauge you plan to use.
Valves, branching, and rolling: anatomy in motion
Valves are one-way gates inside veins. They keep blood moving toward the heart, but they also create points where a catheter can catch or where flow feels different than you expect. If your angle fights a valve, you can get flash and still fail to thread. That is one reason IV flash technique and recognition is a separate skill from puncture alone.
Branch points are another risk. A vein that looks like a single cord can split upstream from your entry site. The catheter tip can slide toward a smaller branch instead of advancing smoothly. When you trace the vein with your fingertip, you are not being cautious for show. You are mapping where the vessel goes after your first few millimeters.
Rolling veins are partly a tissue issue and partly a geometry issue. Veins with less supportive tissue move when probed. Understanding difficult veins and rolling veins in context of anatomy helps you change anchoring strategy instead of repeating the same miss.
From landmarks to palpation: a practical sequence
Use this sequence on your next assessment before you open the catheter package. It builds a mental model you can rely on when the room is loud and the patient is watching.
Scan without a tourniquet first. Look for shadow, fullness, and prior puncture sites. You are choosing a region before you choose a vein.
Apply the tourniquet and wait briefly. Let veins distend. Rushing this step is how people pick the first thing that pops up instead of the best segment.
Trace the vein path with light pressure. Follow at least a few centimeters upstream and downstream. You are checking for curvature, bifurcation, and whether the vein feels cylindrical and resilient.
Select a straight segment longer than your catheter. You need room to flatten your angle after entry without immediately hitting a corner or valve.
Mentally note the depth you feel. Superficial veins should feel like they sit under a thin layer of tissue. If you cannot feel a clear channel, consider whether you need a different site or a different approach, including escalation when appropriate.
Anchor like you mean it. Stable skin anchor changes how the vein behaves under the tip. That is anatomy plus mechanics, not brute force.
Site selection priorities (a simple comparison)
| Goal | Prefer | Use caution |
|---|---|---|
| Short-term peripheral access for most therapies | Straight forearm segment of cephalic or basilic pathway | Areas of flexion if the patient cannot keep the joint still |
| Large-bore need | Larger diameter segment with room for catheter relative to vein width | Veins so small that the catheter fills most of the lumen |
| Fragile skin | Veins with supportive tissue and minimal scarring | Repeatedly punctured ridges that will not hold a catheter well |
Bottom line. The best site is the one that matches catheter size, vein caliber, therapy plan, and patient movement. Anatomy is how you make that match on purpose.
How anatomy knowledge connects to confidence
Uncertainty feeds anxiety. Anxiety drives tremor, rushed movements, and second-guessing. When you can say, "I chose this vein because this segment is straight and away from a branch," you give your nervous system a story that is grounded in structure, not hope. That is part of the same psychology of IV insertion we teach as a foundation, not an afterthought.
If you want a structured path from nervous to competent, start with Level 1: The Method. It is an 8-hour intensive that pairs anatomy and technique with supervised live sticks, with mastery-based progression so you move forward when you demonstrate skill, not when the clock runs out. Level 2: The Craft builds advanced access scenarios, including harder anatomy and ultrasound-guided options, at $299. The bundle is $449 and includes added value on combined enrollment.
Training that maps to real patients
Reading about veins is not the same as learning them under skin. VeinCraft Academy teaches peripheral anatomy in the context of live cannulation with individual coaching from credentialed clinicians who have active field experience. You get repetition, feedback, and the psychology-first curriculum that keeps your hands steady when it counts.
If you are ready to turn anatomy from textbook lines into something your fingers recognize on the first touch, start with an enrollment inquiry. Our team can help you choose between Level 1, Level 2, or the Master the Craft bundle based on your background.
What is vein anatomy for IV cannulation?
It is the practical knowledge of superficial upper-extremity veins, valve locations, branch points, and safe zones used to select cannulation sites and predict how a vein will behave during puncture and threading. It connects what you see and palpate to what you expect after the needle enters the vessel.
Why does vein diameter matter for IV cannulation?
Vein diameter matters because the catheter should fit the lumen with enough room for blood flow around the device. When the catheter is large relative to the vein, the vessel is more prone to injury and failure. A 2021 post-hoc analysis in PLOS ONE on catheter-to-vein ratio and cannulation outcomes reported substantially higher first-attempt success when ratio was in a favorable range compared with when the catheter was large relative to vein size. Your takeaway is not a single number you memorize for every patient. It is the habit of matching gauge to vessel instead of defaulting to the largest catheter you can grab.
Where should you start looking for peripheral IV veins?
Start with the hand and forearm superficial system unless clinical context points you elsewhere. Look for full segments that are straight and away from joints when possible. Move proximally if distal veins are unsuitable, and escalate using agency protocol when peripheral access is unlikely to succeed. Ultrasound-guided IV training exists because sometimes the best answer is not a harder blind attempt. It is a better tool.
How do valves affect IV insertion?
Valves can interrupt smooth catheter advancement even when you have flash, because the tip may sit near a valve leaflet or a branch. If threading meets resistance after a good flash, pause, reassess angle, consider slight rotation or gentle flush technique when appropriate, and know when to stop and reset rather than force a path. Anatomy tells you that resistance is often structural, not personal.
What anatomy mistakes cause infiltrations and blown veins?
Common mistakes include puncturing too shallow and lodging the catheter in the perivascular tissue, advancing through the back wall of the vein, and choosing a site where the vein dives or branches immediately distal to the entry point. For more on complications after the line is in, see IV infiltration signs and treatment. Prevention starts with selection and technique, not only with troubleshooting after failure.
Vein anatomy for IV cannulation is a learnable skill. It is also one of the fastest ways to shrink the gap between "I know what an IV is" and "I know why this vein is the one." If you want that kind of clarity with hands-on practice and honest coaching, explore VeinCraft Academy and build the competence your patients already assume you have.
VeinCraft Academy is a mastery-focused IV cannulation training program for healthcare professionals. All instruction is delivered by credentialed clinicians with active field experience. VeinCraft Academy is a RevivaGo Company.