Difficult veins and rolling veins require advanced cannulation techniques including lateral traction anchoring, steeper insertion angles, vein stabilization with two-finger stretch, and patient-specific approaches for dehydrated, elderly, obese, and chronically ill populations. Rolling veins occur when loose connective tissue allows the vessel to shift laterally during catheter contact.
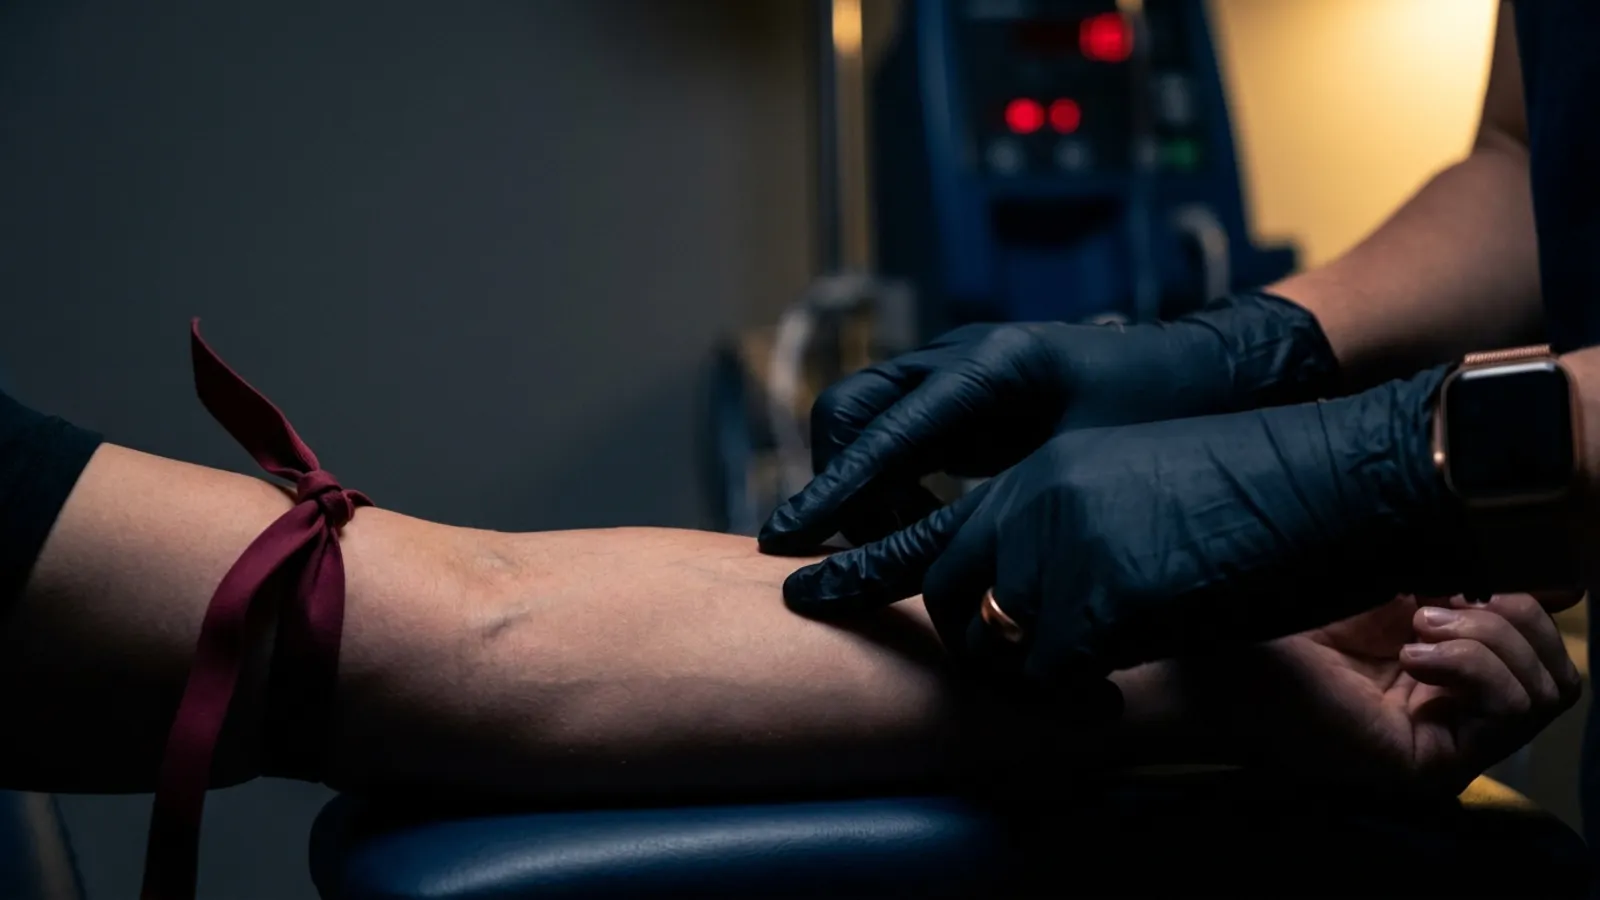
Every provider who starts IVs regularly knows these patients. The dehydrated elderly woman whose veins are paper-thin and roll at the slightest touch. The muscled athlete with veins so deep they're barely palpable. The chronically ill patient whose go-to access sites are scarred from years of draws and infusions. These aren't rare cases. They're Tuesday afternoon.
Most IV training focuses on cooperative veins in ideal conditions, though. You learn to perform well on straightforward patients and then hit a wall when confronted with anything harder. Building a solid foundation with your first-stick IV cannulation training matters, but the gap between "I can start an IV" and "I can start an IV on anyone" is where the real learning happens.
Why some veins are harder than others
Difficult IV access isn't random. It follows predictable patterns based on anatomy, physiology, and patient factors. Once you know those patterns, you start reading patients differently before you ever pick up a catheter.
Anatomical factors
Vein location varies between people more than most training acknowledges. Some patients have superficial veins that are visible and easy to palpate. Others have veins sitting deeper in subcutaneous tissue, harder to locate and needing a steeper angle to reach.
Vein diameter matters too. Smaller veins need smaller-gauge catheters, tighter technique, and gentler insertion to avoid through-and-through puncture. Tortuous veins, the ones that twist and curve rather than running straight, fight you during catheter advancement because the catheter path and the vein path disagree.
Then there's connective tissue. Veins anchored firmly in surrounding tissue stay put during insertion. Veins with loose surrounding tissue shift laterally when the catheter tip touches them. They roll.
Physiological factors
Hydration status directly affects vein accessibility. Dehydrated patients have reduced blood volume, which drops venous pressure and makes veins flatter, smaller, and harder to palpate. This matters most in populations prone to dehydration: elderly patients, patients with GI illness, athletes after intense exertion, and anyone who's been NPO for extended periods.
Temperature affects peripheral circulation too. Cold extremities cause vasoconstriction, shrinking peripheral veins and pushing them out of reach. Warming works because it reverses this, and it's one of the most reliable tools you have for improving access on difficult veins.
Sympathetic nervous system activation from pain, anxiety, or stress causes peripheral vasoconstriction through the same mechanism. A patient who's scared about the IV stick may have noticeably worse vein access than that same patient in a calm state. Managing the patient's head is part of managing the access, which is why understanding the psychology of IV insertion matters as much as technical skill.
Patient population factors
Certain patient populations are consistently harder sticks:
Elderly patients often have fragile, thin-walled veins that bruise easily and may rupture during insertion. Loss of subcutaneous tissue and skin elasticity with aging makes these veins more mobile.
Obese patients have veins buried deeper beneath the skin surface. You often can't see them at all, even with a tourniquet. Palpation becomes the primary tool, and standard-length catheters may not reach.
Pediatric patients have small veins in small extremities, plus you're managing movement and anxiety on top of the technical challenge. Pediatric IV insertion is its own discipline.
Patients with chronic illness who've had frequent IV access often have scarred veins at the common sites. Finding viable alternatives means knowing your anatomy beyond the usual spots and being willing to look.
IV drug users may have damaged, thrombosed, or absent veins in typical locations. Creative site selection and thorough assessment are the only path forward.
Rolling veins: what causes them and how to manage them
Rolling veins frustrate providers at every experience level. But the mechanism behind rolling is straightforward, and the techniques that counter it are learnable. Once you understand both, a rolling vein becomes a solvable problem rather than a dice roll.
What causes veins to roll
Veins roll when they aren't anchored well by surrounding connective tissue. Instead of staying put when the catheter tip contacts the wall, the vein shifts sideways. The catheter slides alongside or past the vein rather than penetrating it.
Several factors make rolling more likely:
- Loss of subcutaneous tissue (common in elderly and cachectic patients) reduces what's anchoring the vein in place
- Loose, mobile skin allows the entire tissue layer to shift during insertion
- Dehydration reduces venous pressure, making veins softer and more compressible
- Location matters: veins on the dorsal hand and lateral forearm tend to be more mobile than those in the antecubital fossa
Anchoring techniques for rolling veins
The main strategy for managing rolling veins is traction, creating a counter-force that holds the vein still during insertion.
With distal traction, your non-dominant hand applies firm downward and lateral traction on the skin 1 to 2 inches below (distal to) your planned insertion site. This stretches the skin and underlying tissue, pulling the vein taut and reducing its ability to shift. The traction has to be firm enough to actually immobilize the vein, not just slide the skin around.
For veins that are especially mobile, two-point stabilization works well. Place one finger above the insertion site and your thumb below to create a two-point anchor. This sandwiches the vein between two stabilization points and cuts lateral movement way down.
Side anchoring is another option. Place a finger alongside the vein (rather than below it) to block lateral movement in the direction the vein tends to roll. This is particularly useful for veins that consistently roll one way.
You can also approach from the side. Rather than inserting directly over the top of a rolling vein, come in at a slight lateral angle. This lets you pin the vein against deeper tissue structures instead of pushing it away.
Insertion technique modifications for rolling veins
Beyond anchoring, a few technique adjustments help with rolling veins:
Don't go slow. Slow needle advancement gives the vein more time to roll away from you. Once you've confirmed your alignment, a quick, controlled puncture through the vein wall shrinks the window for lateral movement.
Go flatter. A 10- to 15-degree insertion angle (rather than 15 to 30) keeps the catheter in contact with a longer segment of the vein. Even if the vein shifts slightly, you're more likely to penetrate.
Drop a gauge size. A smaller catheter displaces less tissue during insertion and is less likely to shove a mobile vein out of position. If a rolling vein is beating you at 20-gauge, try a 22.
Dehydrated patients: assessment and warming techniques
Dehydration is one of the most common causes of difficult IV access, and one of the most fixable. The irony, of course, is that the patients who need IV hydration most urgently are often the hardest to access.
Assessing hydration-related vein changes
Dehydrated veins have a recognizable profile: flat rather than round, soft and easily compressible, hard to palpate even with a tourniquet, and slow to refill after compression. If you spot these signs early, you can adjust your approach before you've already committed to an attempt.
Skin turgor tells you a lot in two seconds. Pinch the skin on the back of the hand. In well-hydrated patients, it snaps back immediately. In dehydrated patients, the skin tents and returns slowly. That quick check tells you what to expect from the veins before you even reach for a tourniquet.
Warming techniques
Heat causes vasodilation, expanding blood vessels. Applying warmth to the intended insertion site for 60 to 90 seconds before the stick can meaningfully improve vein visibility and palpability, especially in dehydrated patients.
In a clinical setting, warm packs or chemical warming packs are easy to grab. In mobile or field settings, wrapping the arm in a warm, moist towel or having the patient submerge their hand in warm water for a few minutes gets similar results.
The hard part is actually waiting. Warming takes time, and cutting it short defeats the purpose. Ninety seconds of warming followed by a first-stick success beats skipping warmth and poking three times.
Gravity-assisted venous filling
Have the patient dangle their arm below heart level for 30 to 60 seconds. Gravity pulls blood into the peripheral veins. Combine this with a tourniquet and warming and you've stacked every advantage available for finding veins in a dehydrated patient.
Elderly and fragile veins: adjusting angle and speed
Elderly patients bring several problems at once: fragile vein walls that rupture easily, thin skin that tears with minimal traction, loss of subcutaneous tissue that makes veins mobile, and sometimes reduced pain sensation that can mask insertion problems.
Modified technique for fragile veins
The firm skin traction that works on rolling veins in younger patients can tear elderly skin. Use gentle, consistent traction instead. Think steady pressure, not pulling.
Insert at 10 degrees or less for fragile veins. A steep angle increases the risk of going through both walls (through-and-through puncture), and thin-walled vessels are especially vulnerable.
Unlike rolling veins where quick penetration helps, fragile veins need a slow, controlled advance. You're trying to enter the vein wall gently enough that you don't blow through the opposite side.
When you see blood flash in the chamber, stop. Confirm you're in the vein, then advance the catheter slowly while withdrawing the needle. Rushing this step is how most vein ruptures happen in elderly patients.
Watch your tourniquet time, too. Prolonged tourniquet application in elderly patients can over-distend already fragile veins and make them more prone to blowing. Apply for assessment, release briefly, then reapply just before insertion.
Obese patients: palpation over visualization
In patients with significant body habitus, forget about seeing veins. They're too deep beneath the skin surface, even with a tourniquet and warming. Access in these patients depends almost entirely on what you can feel.
Developing palpation sensitivity
Palpation for IV access takes deliberate practice. You're feeling for a soft, compressible, tubular structure beneath the skin. The vein has a "bouncy" quality: it compresses under finger pressure and springs back when you release. That resilience is what separates a vein from a tendon (firm, non-compressible) or an artery (pulsatile).
Practice palpating on every patient, even the ones with veins you can plainly see. Over time, your fingertips get better at detecting veins at increasing depths. That pays off the day you're working on an obese patient and palpation is all you have.
Site selection for deep veins
When standard access sites don't give you anything to work with, look elsewhere:
- The antecubital fossa often has deeper veins that remain palpable even in obese patients
- The medial upper arm may give you access to the basilic vein
- The posterior forearm sometimes has palpable veins that aren't accessible from the anterior surface
Longer catheters
Standard-length IV catheters (1 to 1.25 inches) may not reach deep veins in obese patients. Longer catheters (1.75 to 2 inches) give you extra length to get through deeper subcutaneous tissue. Use a steeper insertion angle (25 to 30 degrees) to reach the depth your palpation identified.
When to escalate: knowing your limits
Part of getting good at difficult veins is recognizing when you're outmatched. That's clinical maturity, not weakness.
Two failed attempts on different sites is the general threshold. Going beyond two increases patient discomfort, causes tissue damage, and rarely succeeds when the first two didn't.
Escalation options include a more experienced colleague, ultrasound-guided insertion, or in some settings, a vascular access team or PICC line placement. But what if ultrasound-guided IV insertion wasn't something you had to hand off? What if it was already in your toolkit?
How VeinCraft Level 2 addresses hard sticks
VeinCraft Academy's Level 2: Mastery course is built for providers who want to move past basic competence into reliable performance on difficult patients. Level 2 includes ultrasound-guided vascular access, the same skill that typically requires a separate $400+ specialty course bundled into the program.
The Level 2 curriculum covers:
- Assessment techniques specific to rolling veins, deep veins, and fragile veins
- Modified insertion techniques for special populations (elderly, obese, dehydrated, diabetic, pediatric)
- Ultrasound-guided vascular access: probe technique, vessel identification, real-time guided insertion
- Traction and anchoring methods for mobile veins
- Palpation training for deep-vein access
- Clinical decision-making for complex access scenarios
- Live-patient practice with challenging presentations under individualized instruction
Level 2 builds on the psychology-first foundation from Level 1, so you're developing these advanced techniques from a place of confidence rather than white-knuckling through anxiety.
If you're ready to get better at difficult access, explore VeinCraft Academy's enrollment options.
Frequently asked questions about difficult veins
Why do some veins roll during IV insertion?
Veins roll when surrounding connective tissue doesn't anchor them well enough. When the catheter tip contacts the vein wall, the vein shifts sideways instead of allowing penetration. This happens more often in elderly patients with reduced subcutaneous tissue, dehydrated patients with soft veins, and veins on the dorsal hand or lateral forearm. Traction and anchoring techniques counter rolling by holding the vessel steady during insertion.
What is the best technique for dehydrated patients with difficult veins?
Apply warmth to the insertion site for 60 to 90 seconds to promote vasodilation. Have the patient dangle their arm below heart level to encourage venous filling. Apply a tourniquet and reassess. Use a smaller-gauge catheter if needed, and approach at a flat angle. Taking time with warming and positioning works far better than multiple rushed attempts on constricted veins.
How many IV attempts should I make before escalating?
Two attempts on different sites is the standard threshold. Going beyond two failed attempts increases patient discomfort, causes tissue damage, and rarely succeeds. Options include asking a more experienced colleague, requesting ultrasound-guided insertion, or calling a vascular access team.
What gauge catheter should I use for rolling or difficult veins?
A smaller-gauge catheter (22-gauge instead of 20-gauge) is often the better choice for rolling or difficult veins. Smaller catheters displace less tissue on entry, which reduces the lateral force that pushes mobile veins out of position. They also require less precise alignment for successful cannulation. The trade-off is slower flow rates, so consider your clinical needs. For fluid resuscitation or rapid medication delivery, you may need a larger bore and should pair it with aggressive anchoring and traction techniques.
VeinCraft Academy is a mastery-focused IV cannulation training program for healthcare professionals. All instruction is delivered by credentialed clinicians with active field experience. VeinCraft Academy is a RevivaGo Company.